Quick Start
Get started with Hosted Checkout.
This page provides step-by-step instructions for setting up a basic Hosted Checkout integration using the permanent or dynamic link integration method.
To get started, choose your Hosted Checkout integration method. For more information about each method, see:
Find the step-by-step guide for the permanent link method quick start or dynamic link method quick start below.
Permanent Link Quick Start
Use the instructions below to set up a basic hosted payment page with a permanent link. See our Permanent Link Method guide to customize and add optional features with this integration method.
Create a Sandbox Account
See Create a Sandbox Account to set up a Maast merchant portal sandbox account, which you will use to create your permanent link.
Create a Permanent Link
Follow these steps to generate a permanent link that will redirect customers to your hosted checkout page:
- While signed in to your merchant sandbox account, select 'Administration' in the left-hand menu.
- Under 'Account Configuration,' select 'Settings':
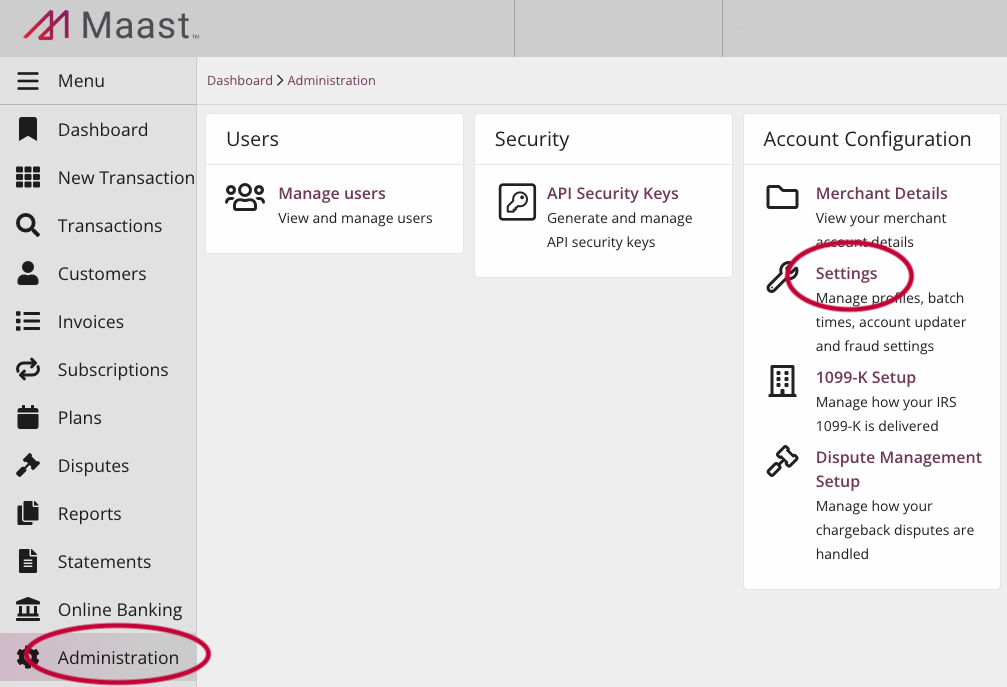
This takes you to merchant account settings:

- Select the 'Checkout' tab at the top.
This opens the checkout configurations page:

- Select 'New Checkout Profile.'
This opens a form to create a new checkout profile:
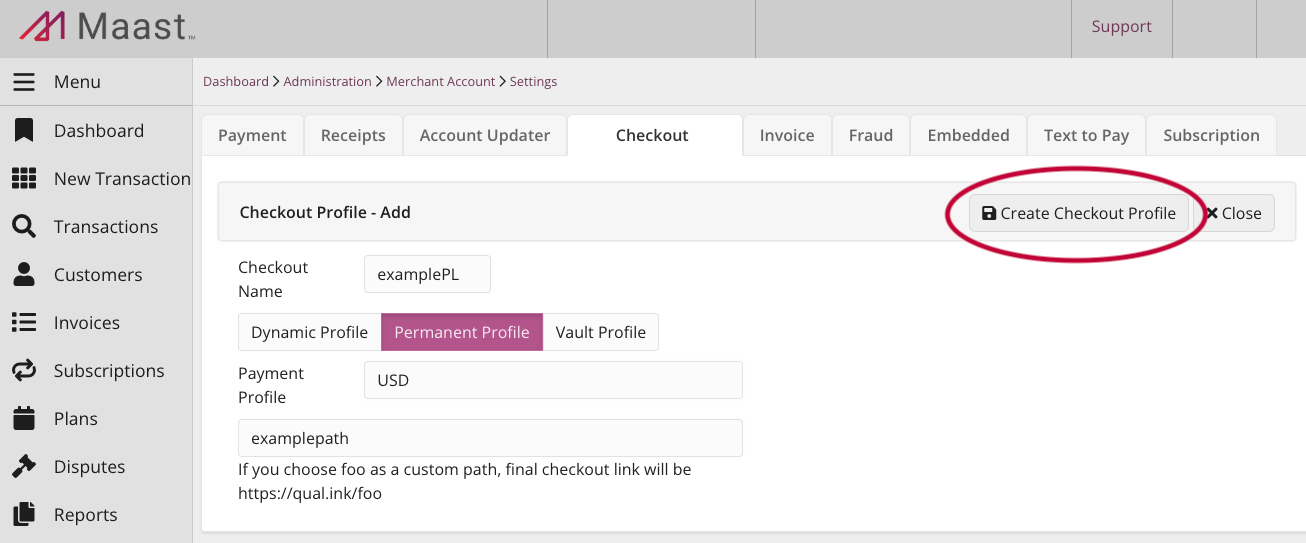
- In the 'Checkout Name' field, type a distinct name (preferably one you can distinguish from other links you create).
- Select 'Permanent Profile.'
- Select your preferred currency.
- Type a custom path for your link.
- Select 'Create Checkout Profile.'
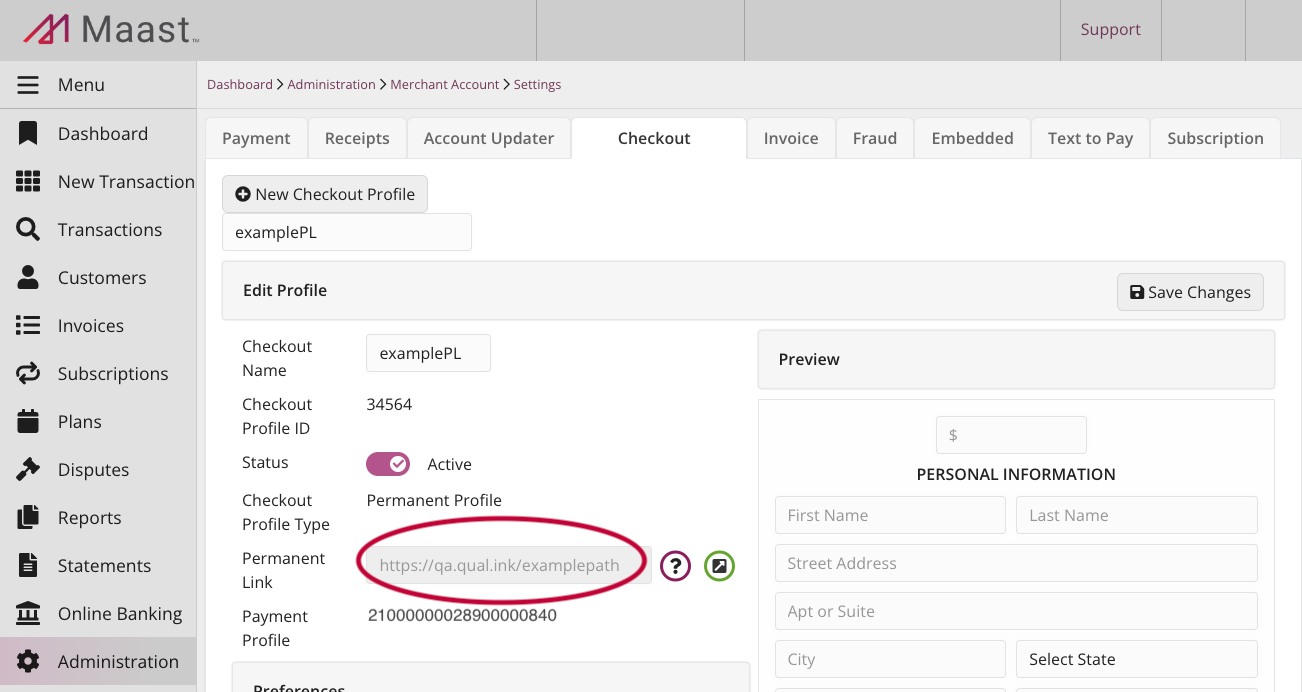
You will be redirected to your checkout profile's configurations page, where you can view and copy your permanent link:
Integrate
Follow these steps to integrate Hosted Checkout with the permanent link method:
- While signed in to your merchant sandbox account, select 'Administration' in the left-hand menu.
- Under 'Account Configuration,' select 'Settings':
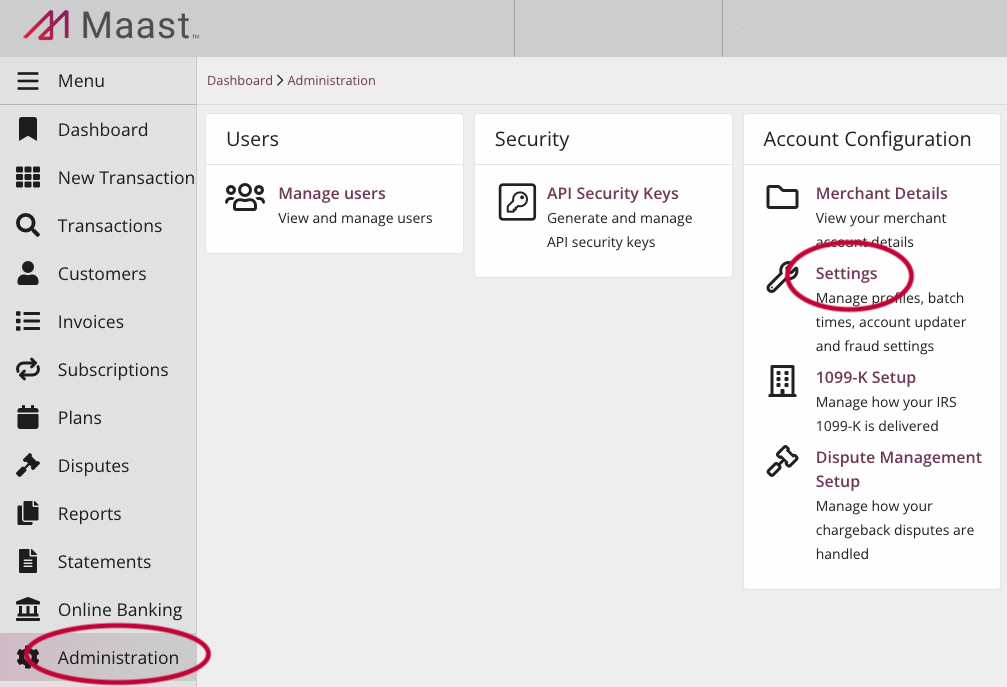
This takes you to merchant account settings:

- Select the 'Checkout' tab at the top.
This opens the checkout configurations page:
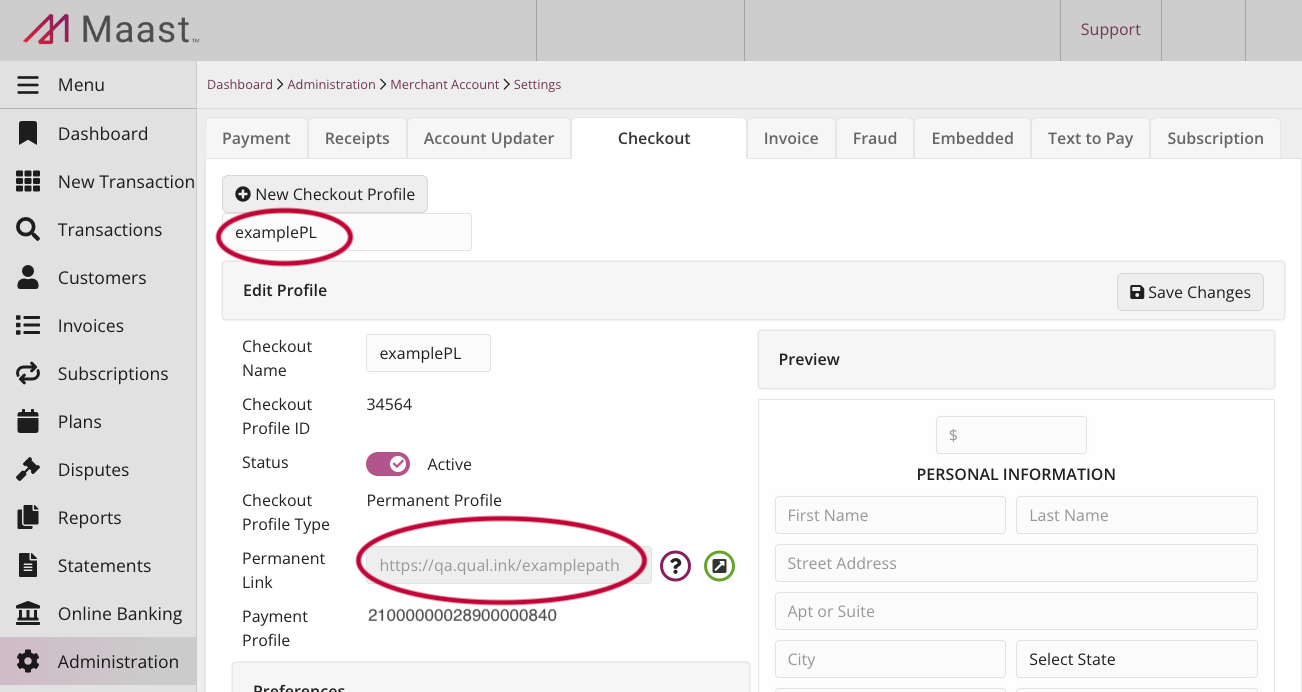
- Look below 'New Checkout Profile' and ensure the desired checkout profile is selected. To change profiles, click the name below 'New Checkout Profile' and select from the drop-down menu that appears.
- Under 'Edit Profile,' find the address in the 'Permanent Link' field.
- Copy the address.
- Add the address as a link from your site or app. You can also send the link or its address to your customers through invoices and other communications.
Test and Go Live
See our Test and Go Live guide to test the integration and configurations of your Hosted Checkout permanent link and to start transacting with an active production account.
Dynamic Link Quick Start
Use the instructions below to set up a basic hosted payment page with dynamic links. See our Dynamic Link Method guide to customize and add optional features with this integration method.
Create a Sandbox Account
See Create a Sandbox Account to set up a Maast merchant portal sandbox account, where you can generate your API credentials and configure the hosted payment form for your dynamic checkout profile.
Get your Sandbox Security Key
Follow the steps in Get Your API Credentials to get a sandbox merchant ID and API key.
Integrate
Perform these tasks to implement your dynamic checkout link:
- While signed in to your merchant sandbox account, select 'Administration' in the left-hand menu.
- Under 'Account Configuration,' select 'Settings':
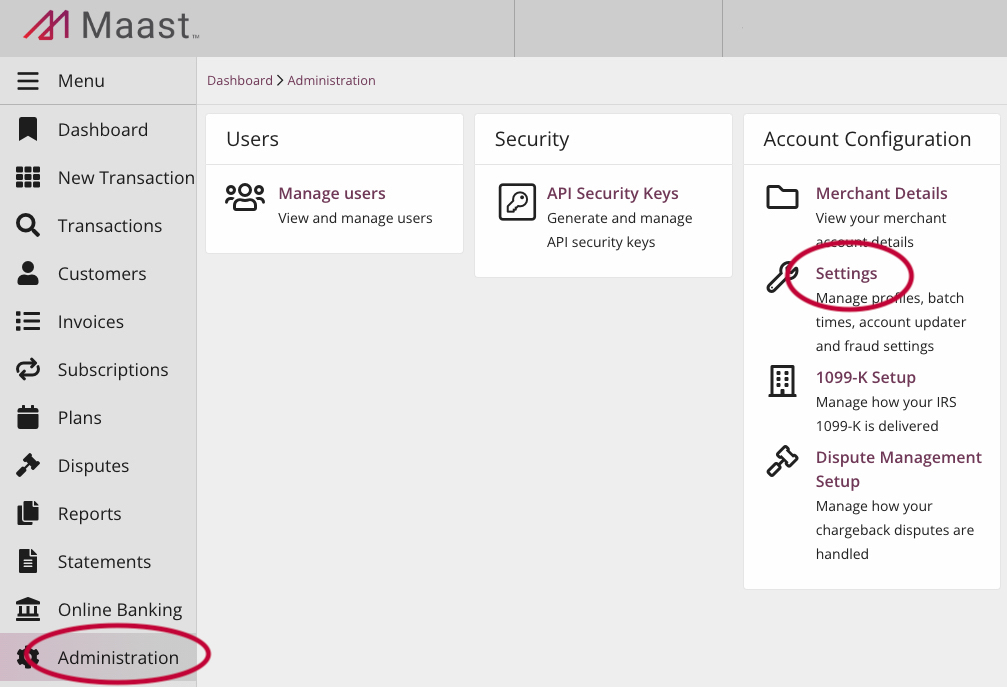
This takes you to merchant account settings:

- Select the 'Checkout' tab at the top.
This opens the checkout configurations page:
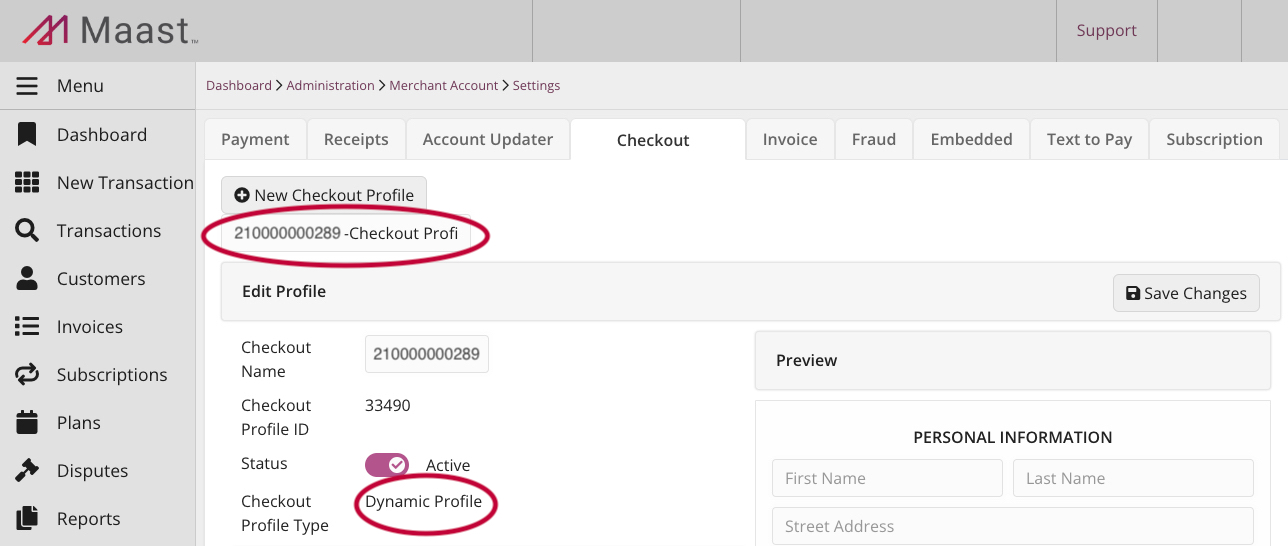
- Ensure that the desired checkout profile is selected and that it is a dynamic profile:
- If you have not created a new checkout profile, you can use the default checkout profile that is already there.
- If you have multiple checkout profiles, you can change between profiles by clicking the name below 'New Checkout Profile' and selecting from the drop-down menu that appears.
- Find your checkout profile ID in the 'Edit Profile' section. Copy and save that value:
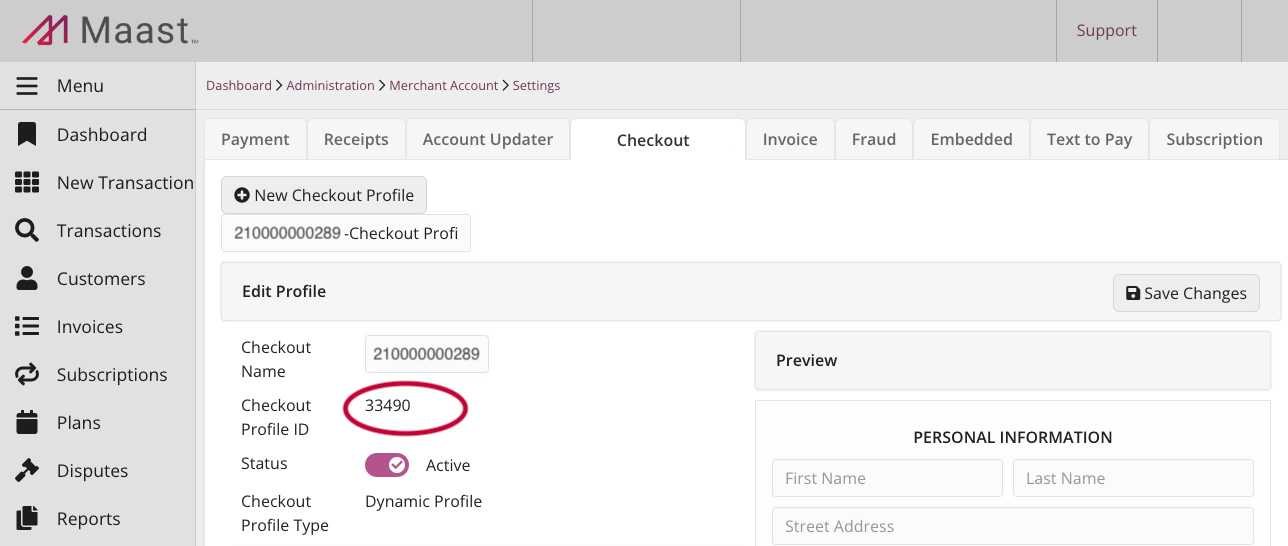
- Follow the steps in the Create a Checkout Link guide to generate a dynamic checkout link. In the request, use the sandbox API security key and the checkout profile ID (
checkout_profile_id) you have generated with this guide.
Test and Go Live
See our Test and Go Live guide to test your dynamic link integration and to start transacting with an active production account.
Updated over 1 year ago
