Webhooks in Maast Manager
This page provides instructions for creating and managing webhooks through the Maast Manager portal. See the Webhooks API guide to add and manage webhooks through our API.
Create a Webhook in Maast Manager
Follow these steps to create a webhook in the Maast Manager portal:
- Follow the steps in Create a Sandbox Account to create and sign in to a merchant sandbox account.
- Select 'Administration' from the left-hand menu.
- Under 'Integration,' select 'Webhook Configuration.'
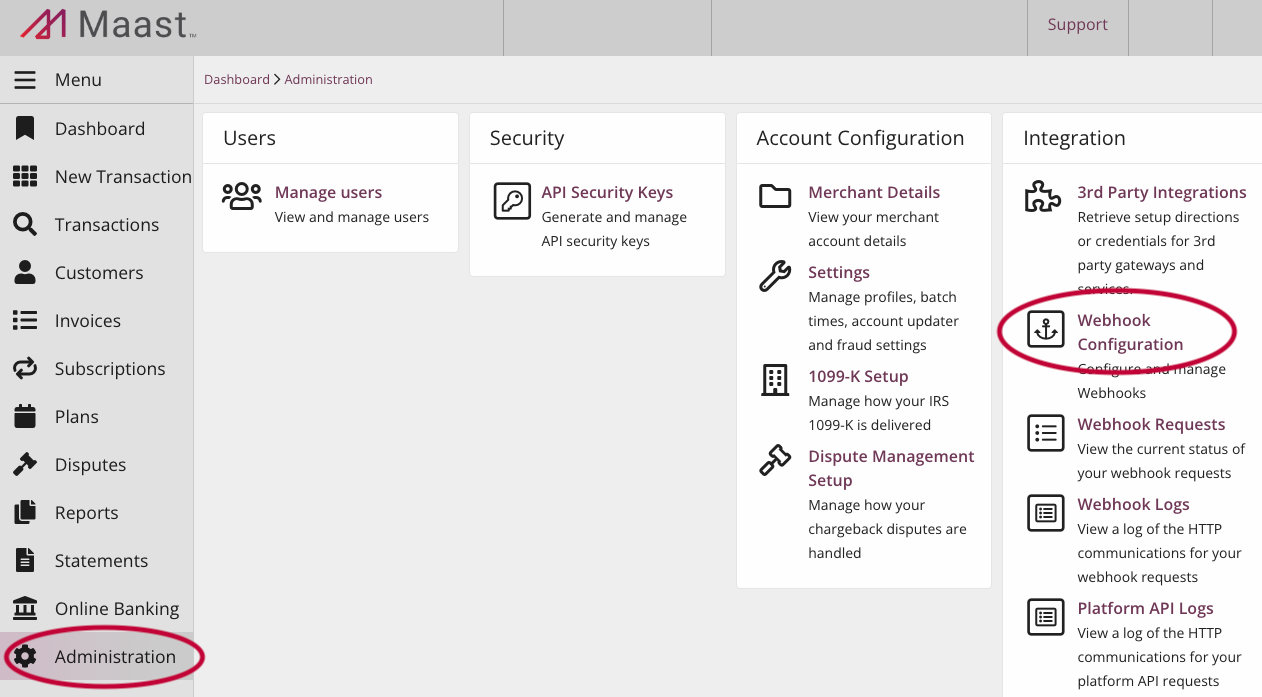
You are now on the webhook configurations page for all of this account's webhooks:

- Click the + button in the top left to add a new webhook.
This opens a form for a new webhook:
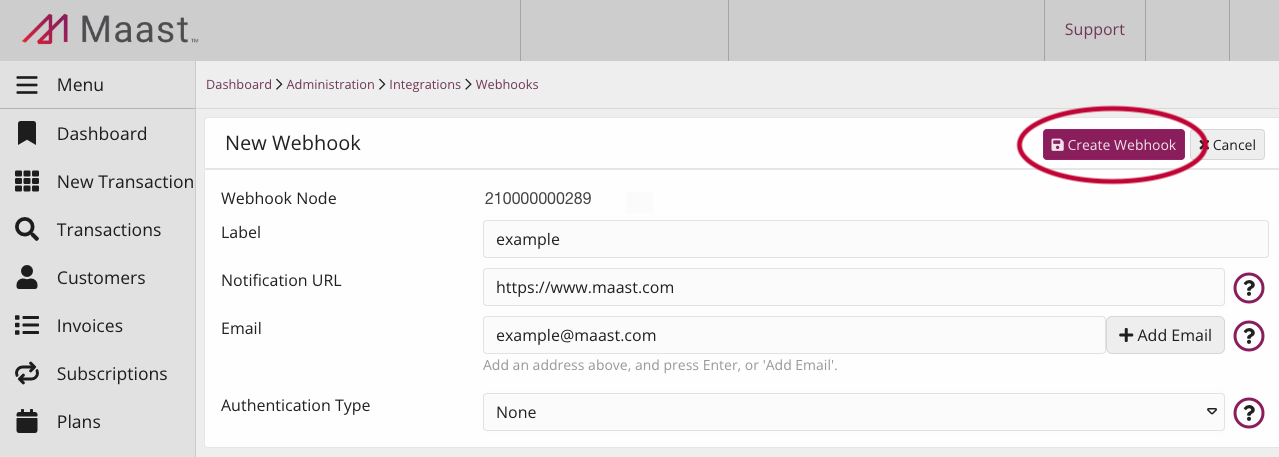
- Enter the following information:
- Label - A label for your webhook.
- Notification URL - The URL to which Maast will post webhook events. This must use HTTPS.
- Email - Type and select 'Add Email' to add at least one email address. Maast will notify this address if the webhook is suspended.
- Authentication Type - Use the drop-down menu to select what will secure the webhook POST request to your server. Adding HTTP Basic authentication will enforce access control to all webhook notifications.
- Select 'Create Webhook.'
This opens a menu of webhook events:
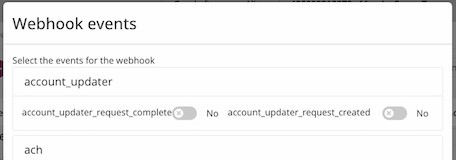
- Select the events you want to receive notifications about, then select 'Done.'

Your webhook secret will appear in a security key window:
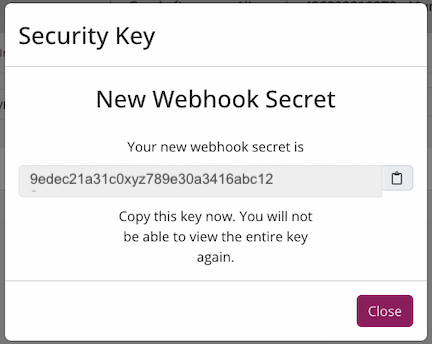
- Click the clipboard icon to copy your webhook secret. Save the secret.
Save Your Secret
The site will not show you the entire webhook secret again. If you lose it, create a new secret by rotating it: Open the configurations page for your webhook and, under 'Webhook Secret,' select 'Rotate.' Leave the time period blank.
Edit a Webhook in Maast Manager
To edit a previously created webhook in the Maast Manager portal, do the following:
- Sign in to the Maast merchant portal and select 'Administration' from the left-hand menu.
- Under 'Integration,' select 'Webhook Configuration.'
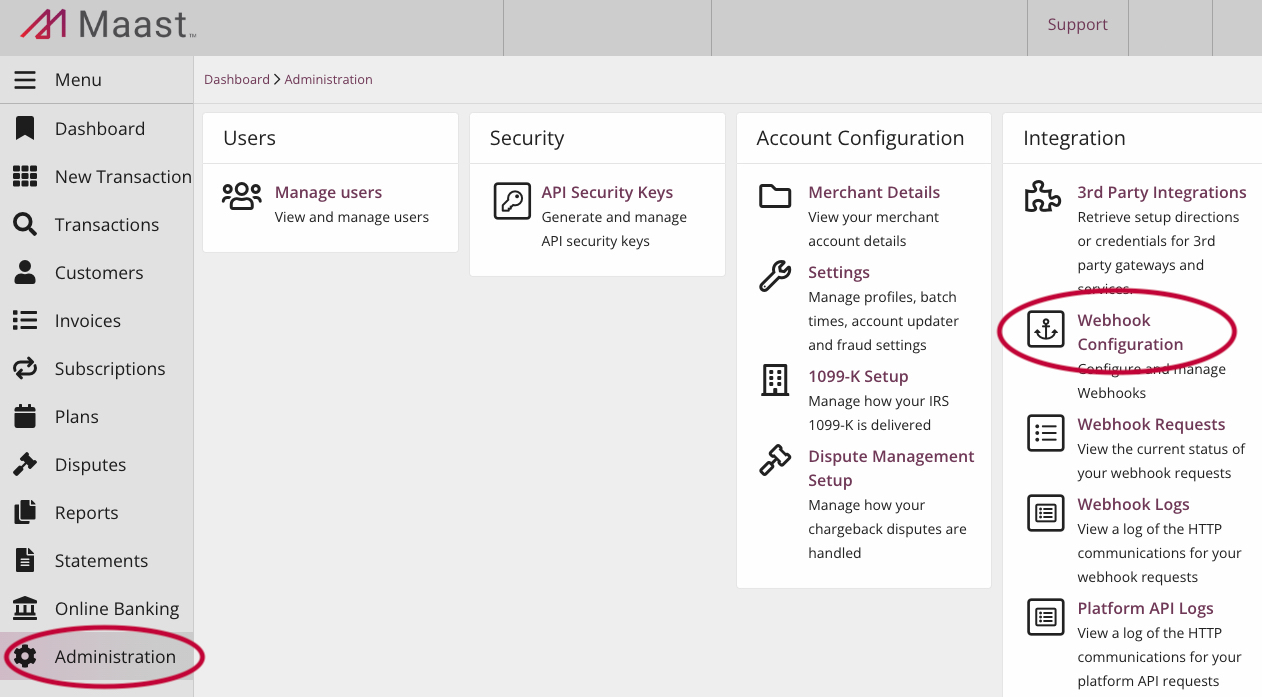
You are now on the webhook configurations page for all of this account's webhooks:

- Select the webhook you wish to edit from the table.
This takes you to the individual configurations page for that webhook:
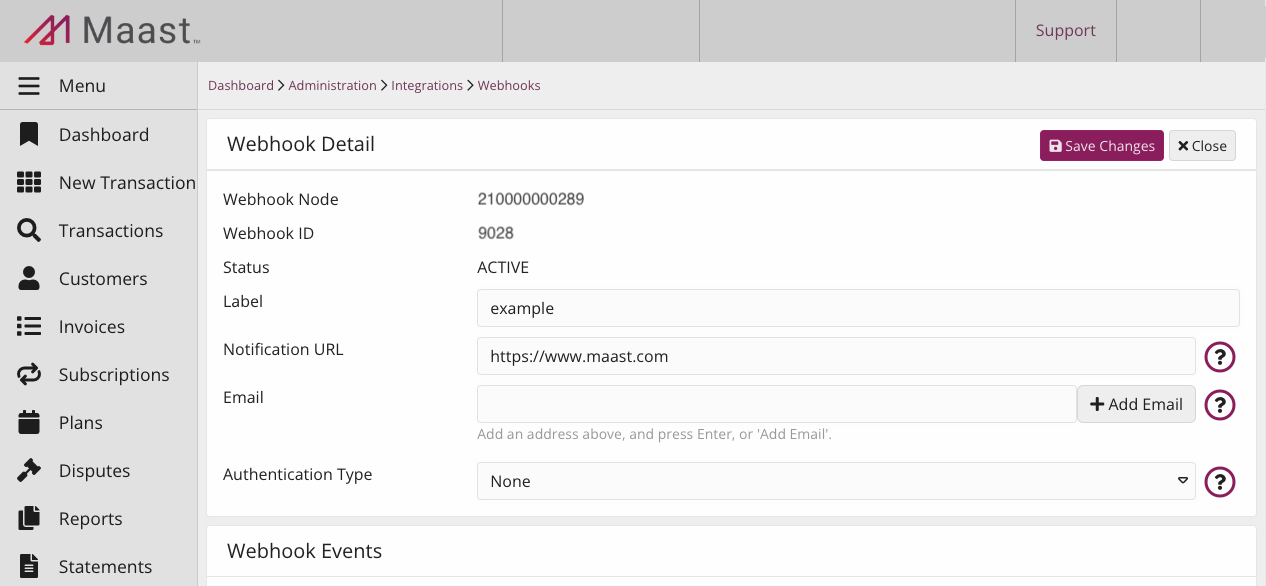
Here you can do the following:
- Edit the information fields provided when creating a webhook.
- Change which events to receive notifications about.
- Rotate your webhook secret.
- When you select 'Rotate,' you can enter how long you want to keep the old secret valid after you generate a new one. This allows you time to update your systems with the new secret. During this period, the webhook has two simultaneous secrets.
- To immediately invalidate the old secret, leave the time period blank.
When you have made your configurations, select 'Save Changes.'
Save Changes
Changes to a webhook's configurations do not automatically save. Remember to select 'Save Changes' to set your configurations.
Validate a Webhook URL in Maast Manager
Follow these steps to validate that your URL can receive notifications:
- Sign in to the Maast merchant portal and select 'Administration' from the left-hand menu.
- Under 'Integration,' select 'Webhook Configuration.'
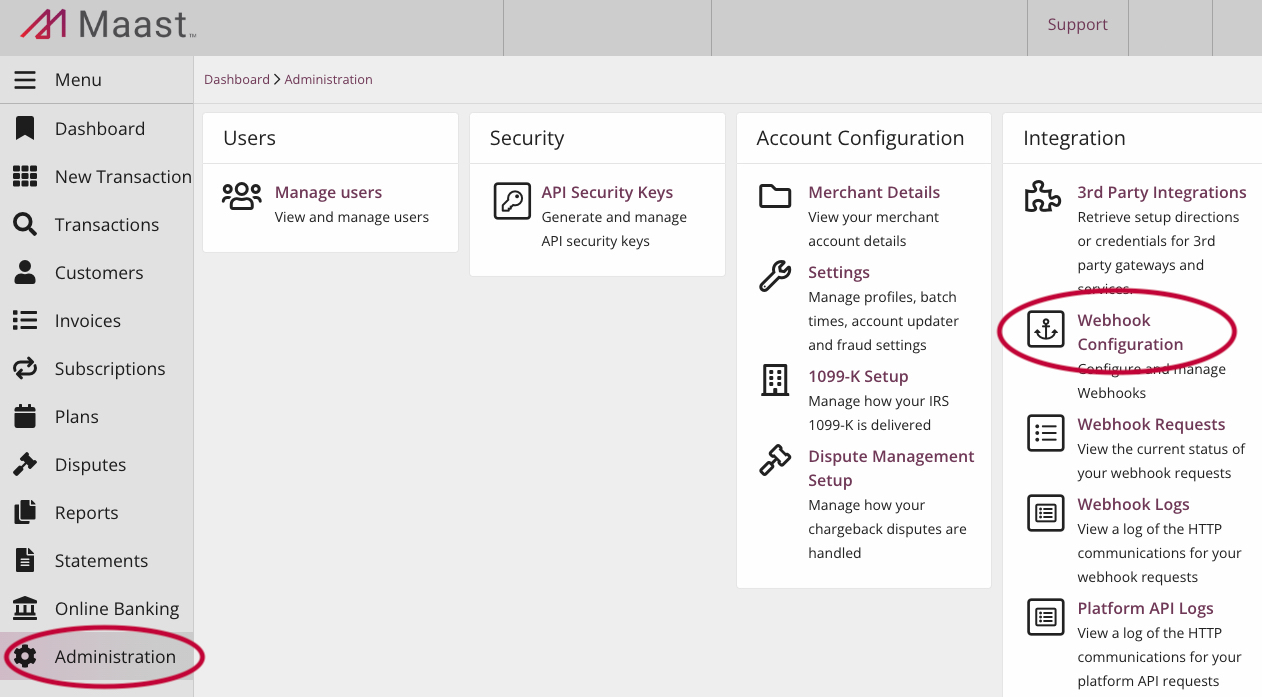
You are now on the webhook configurations page for all of this account's webhooks:

- Locate your webhook in the table. In its 'Action' column, select 'Validate.'
A message will appear that confirms validation or failure. If your URL is not validated, the message specifies the HTTP error to address.
Disable or Enable a Webhook in Maast Manager
A webhook can be enabled (also referred to as "active") or disabled (also referred to as "inactive"). Do the following to enable or disable a webhook in Maast Manager:
- Sign in to the Maast merchant portal and select 'Administration' from the left-hand menu.
- Under 'Integration,' select 'Webhook Configuration.'
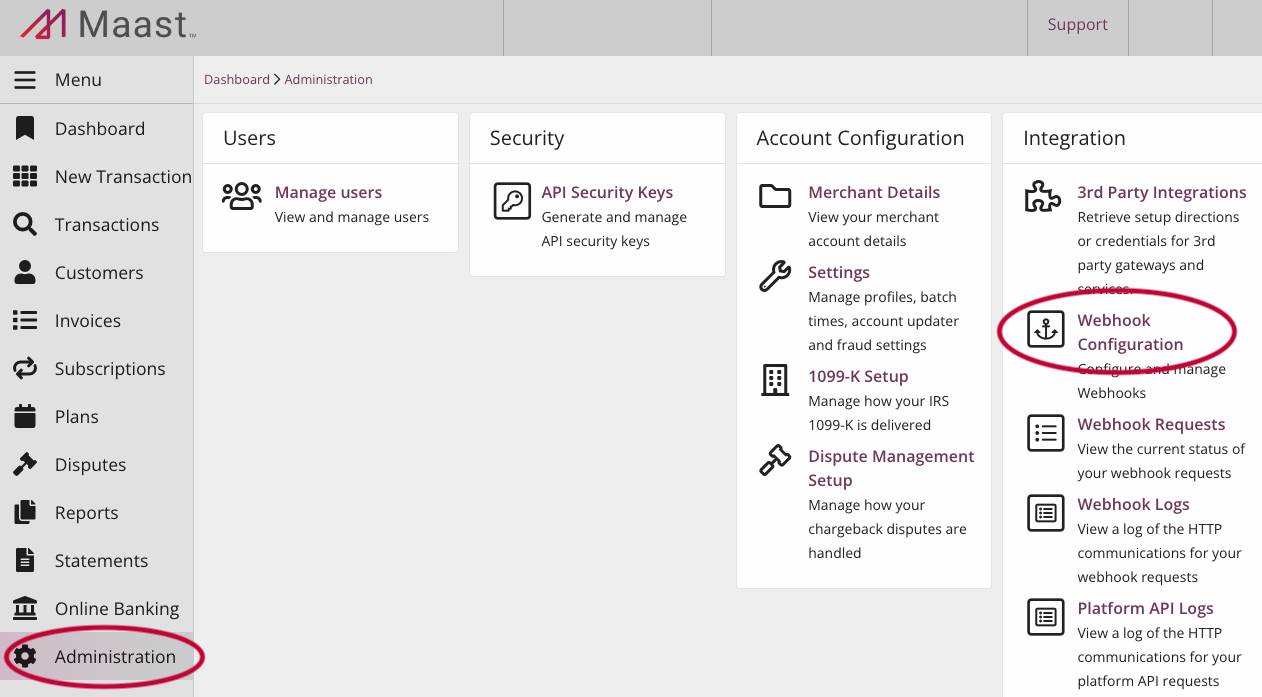
You are now on the webhook configurations page for all of this account's webhooks:

- Locate your webhook in the table and view its current status in the 'Status' column. (See this table for possible webhook statuses.)
- To disable an active (enabled) webhook, select its 'Disable' button in the 'Action' column. To enable an inactive (disabled) webhook, select its 'Enable' button in the 'Action' column.
The webhook's 'Status' column updates immediately to reflect the change.
Review Webhook Requests in Maast Manager
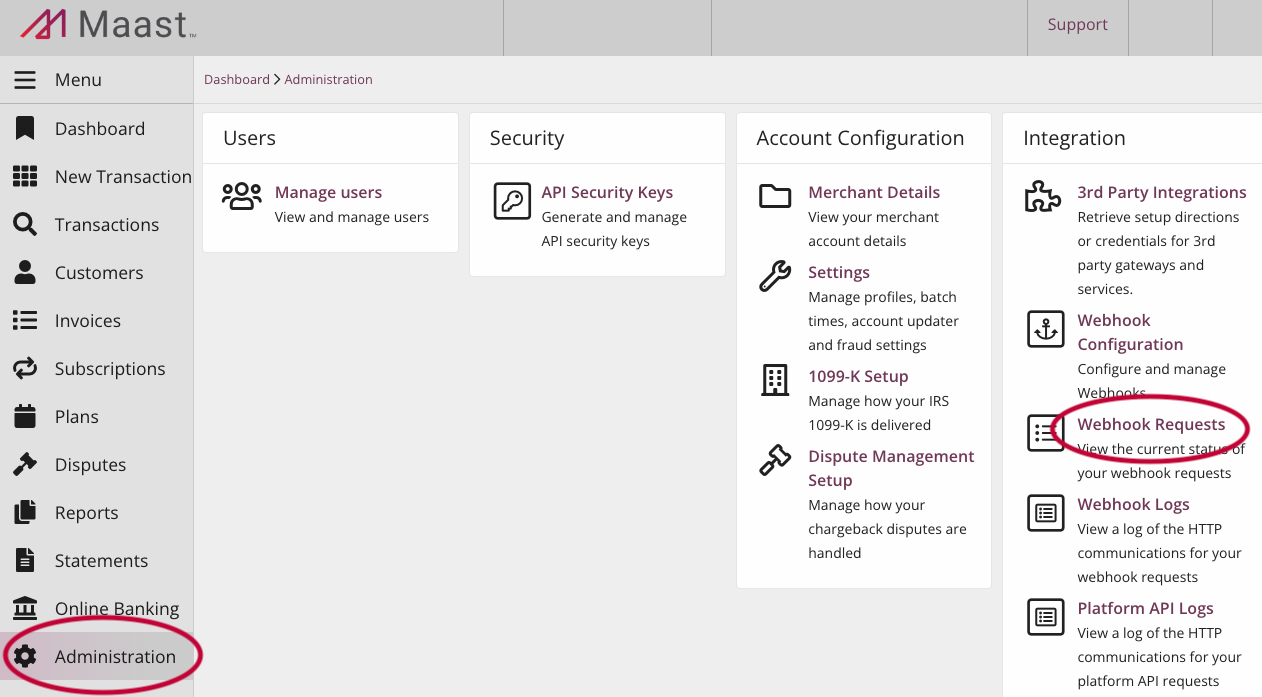
Follow these steps to view the current status of your webhoook requests in the Maast Manager portal:
- Sign in to the Maast merchant portal and select 'Administration' from the left-hand menu.
- Under 'Integration,' select 'Webhook Requests.'
Review Webhook Logs in Maast Manager
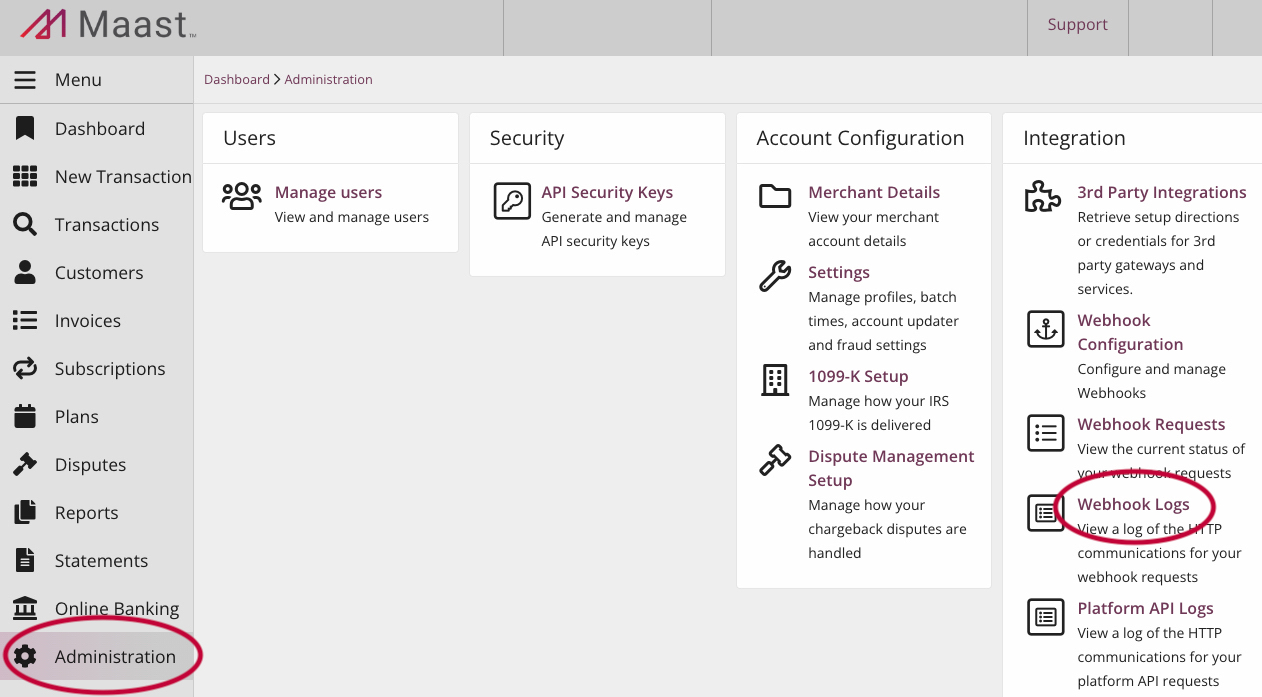
To view a log of the HTTP communications for your webhook requests, do the following:
- Sign in to the Maast Manager portal and select 'Administration' from the left-hand menu.
- Under 'Integration,' select 'Webhook Logs.'
Updated over 1 year ago
